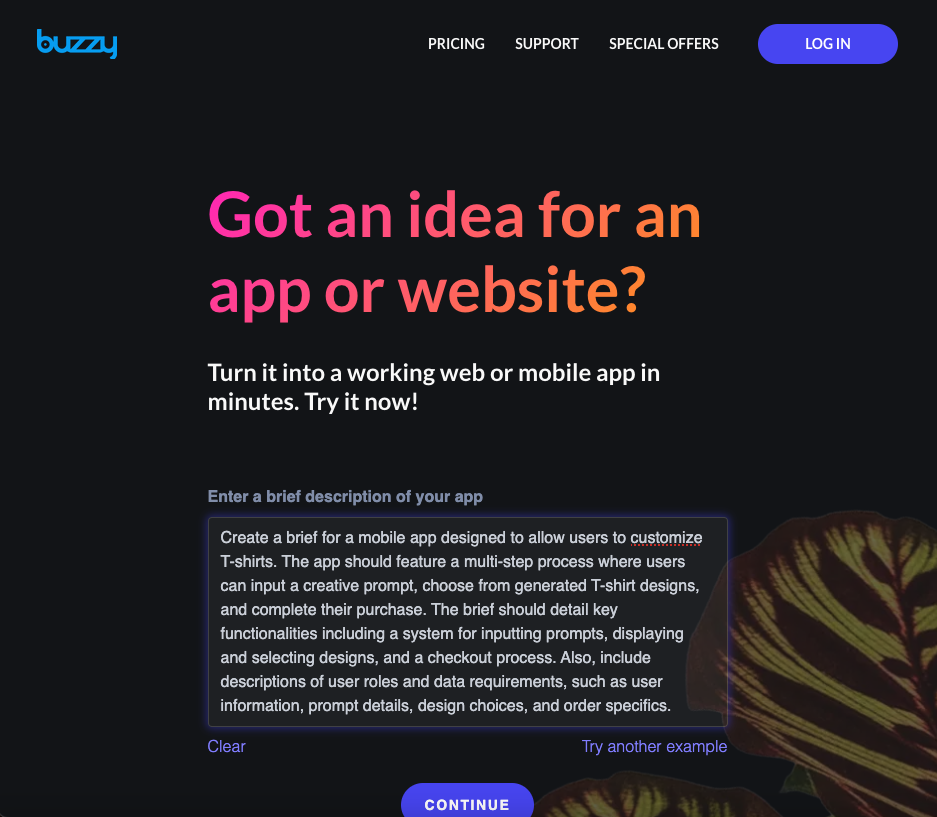
OK, it’s the start of the year, and you have an idea. How quickly could you build a Minimum Viable Product (MVP)? What if you could do it in just a few days? Let’s explore this possibility.
Firstly, the idea: For this article, we’re creating a Generative Artificial Intelligence (GenAI) T-Shirt creator - try it out BuzzyShirt.
Our goal is to demonstrate a complete cycle: starting with a prompt and ending with ordering a T-shirt for delivery.
Background: Buzzy is an AI-powered no-code platform. As of writing this article, we were debating whether to allow actual ordering of the shirts you create. Our team, being small, is concerned about non-technical issues like returns or complaints about shirt shrinkage. However, we may enable this feature, or alternatively, we are providing all the source code for you to implement it yourself if you choose.
Our AI-powered T-shirt generator is not unique, but we aim to illustrate a few key points:
You can build a complete, working solution incredibly quickly.
We demonstrate integration with GenAI for something functional - in this case, AI image generation. There are various engines with published APIs like OpenAI's Dall-e, Leonardo.ai, Google, and Stable Diffusion. We chose Leonardo.ai. Note that some top AI Image tools, like Midjourney, did not have a published API at the time of writing.
You can integrate with other backends like Printful and Stripe as two examples required to complete this application
Extending your application with GenAI is intriguing. There are numerous scenarios where GenAI can significantly impact your application, whether it's generating content or aiding users in making informed decisions (pending hallucinations). This is likely to become a common pattern.
We chose Printful.com for integration with an enterprise solution for procurement and delivery. They offer a great API and handle all product-related aspects, even returns. We limited our product to a black T-shirt for simplicity, in line with the MVP spirit.
So, let's dive in.
Step 1- start with a prompt
The result is a starting point. While AI is incredible, several key variables impact the outcome:
The quality of your prompt - you probably won’t perfect it on your first try. You can either start over or refine it in the Buzzy Workspace by ‘chatting’ with the AI.
What you’re trying to build - AI excels at certain tasks, like setting up CRUD screens and providing a best practices Figma file for quick iteration. More complex requirements or specialized capabilities like augmented reality may not be within its reach yet.
The proficiency of the AI - generative AI is astounding yet nascent, and it has its limitations. Understanding that AI is an accelerator is key; it will get you closer to the endpoint faster.
How good Buzzy is - like AI this is new/bleeding edge tech. Given the above awesomeness, combined with the pitfalls Buzzy is going to speed things up. It may not get you over the finish line in minutes, but it can get you almost there and combined with some design and tech skills, depending on what you’re creating it’s going to accelerate the process dramatically.
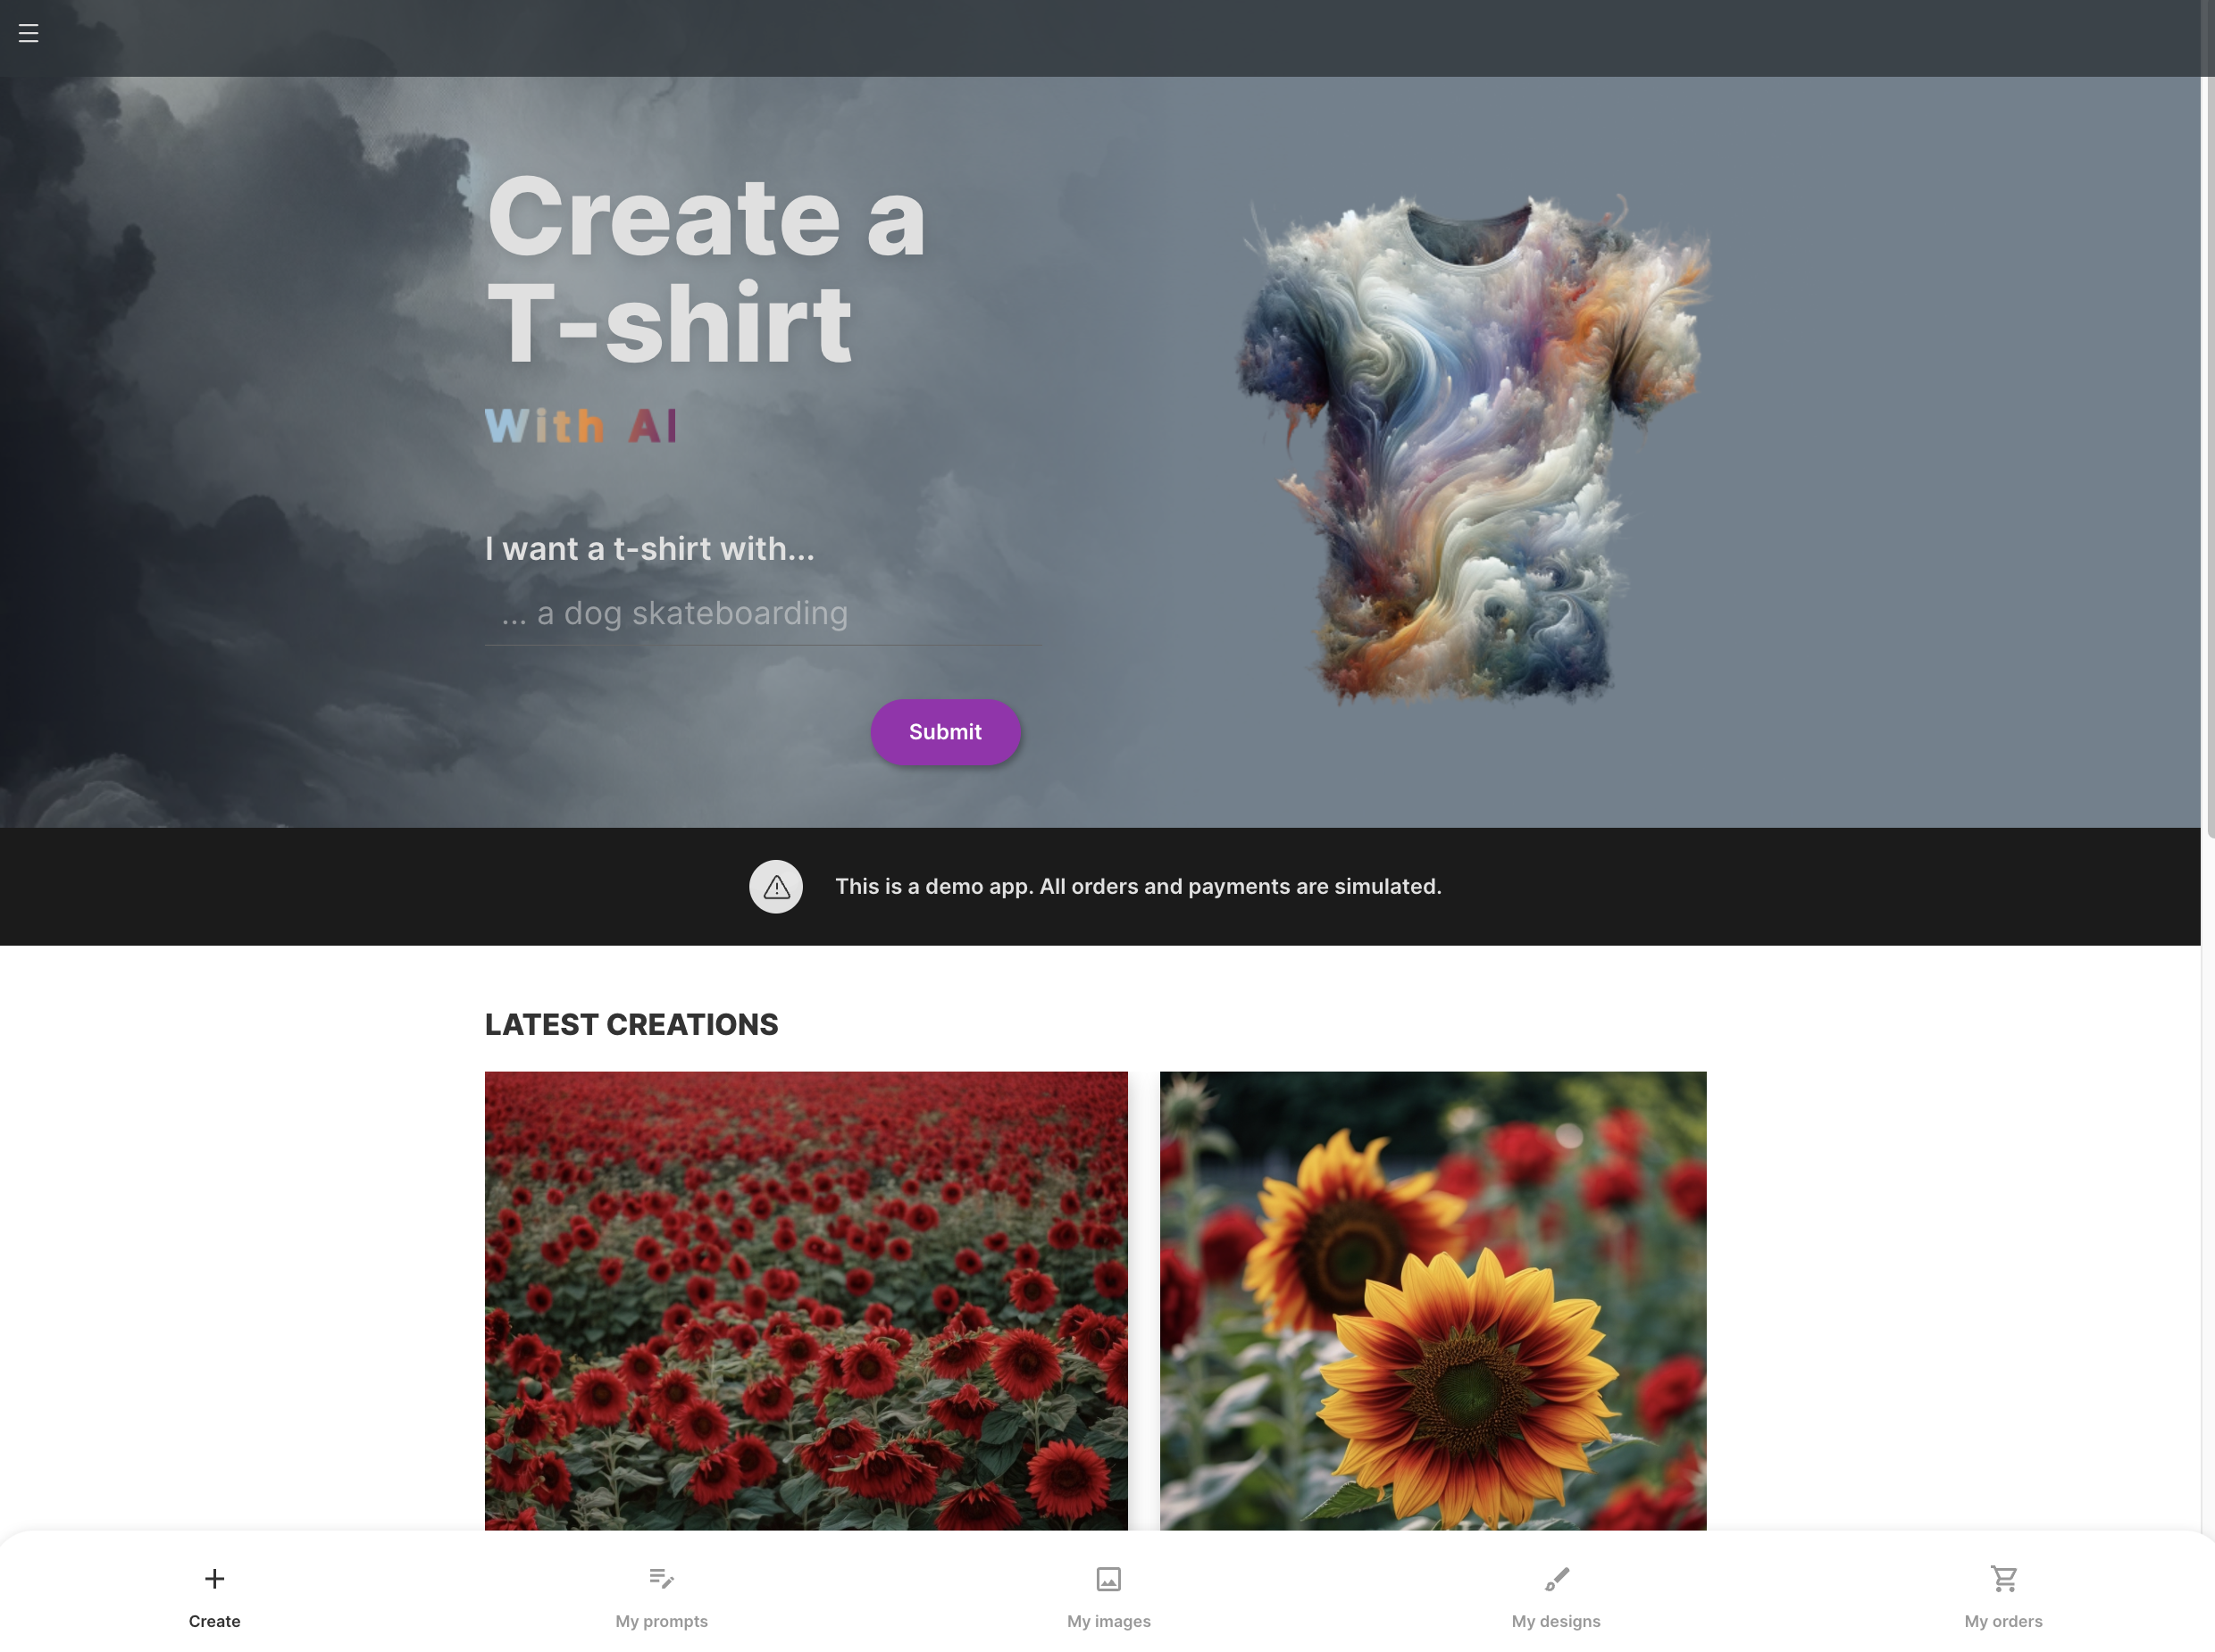
Here's v1 4 - 5 minutes later - an actual working application in a browser. You can have a play, click around it and see what functionality is right/wrong
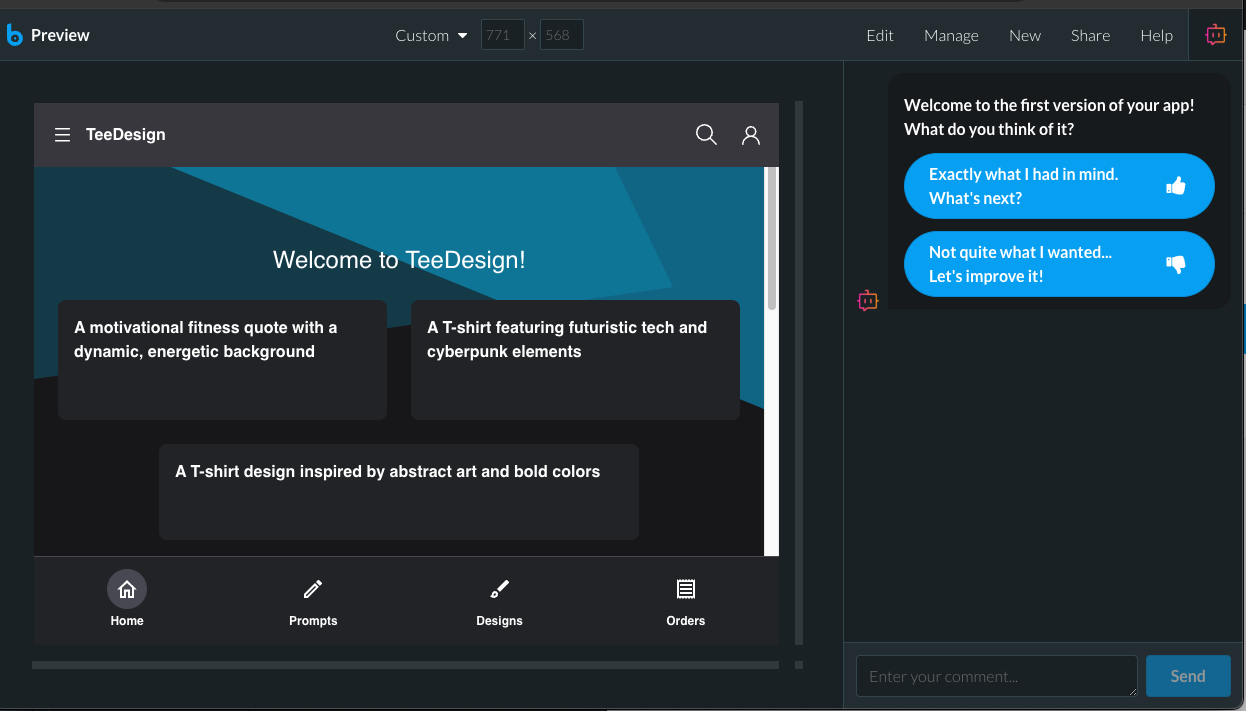
Remember, it only took several minutes to get to this point and we reached an awesome starting point with core navigation and a data model.
You can view the datamodel’s datatable by going to the Workspace -> Data and seeing each one of the tables. For example, here's the "Design" datatable:
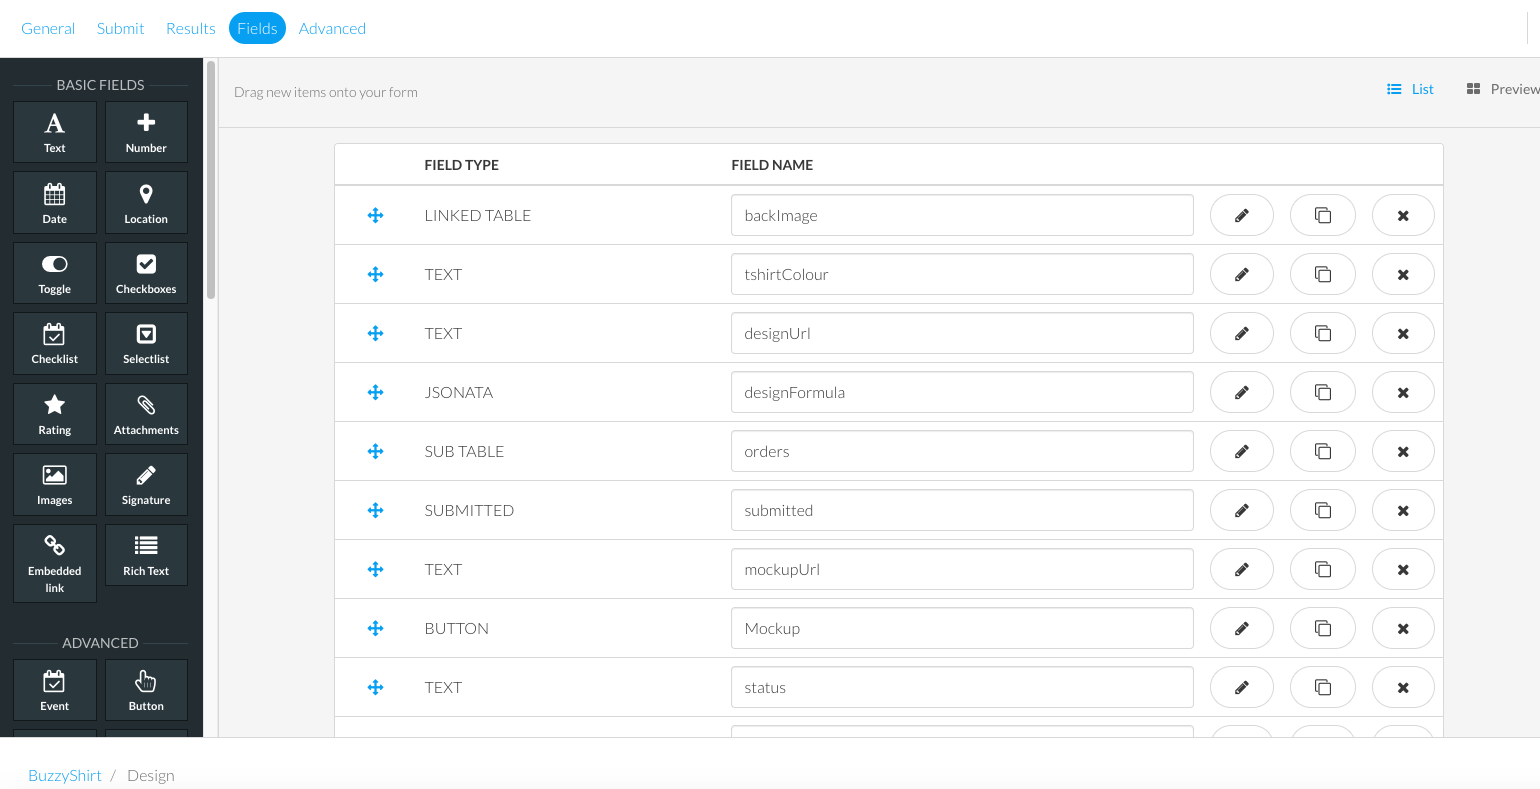
You can see the it has a "SUB TABLE" for "orders". This models a one to many relationship.
Don’t make changes here, as we’re about to discuss options for that.
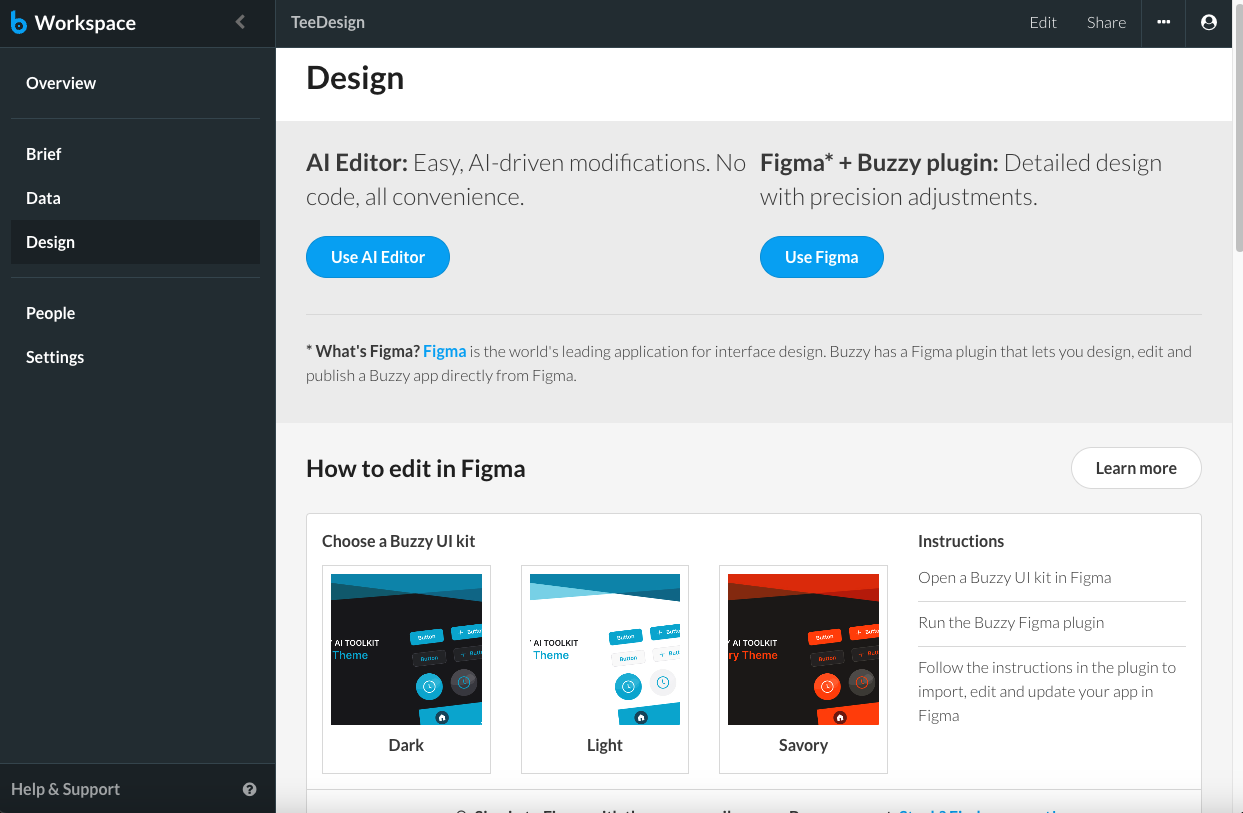
Option 1 - Use the AI to make high level changes to your application
Buzzy’s AI handles scenarios like changing the data model and flow, but it currently cannot alter the look and feel, yet. However, we plan to add this capability soon. In the meantime, using Figma as the primary editing tool is the way to go for design changes.
As an example, let’s say that, the initial prompt did not do a great job of defining the relationship between data entities. So a simple iteration / instruction to the AI could be “Update the app to ensure a Prompt has many Images. An Image can have many Designs. Each Design can have many Orders.”
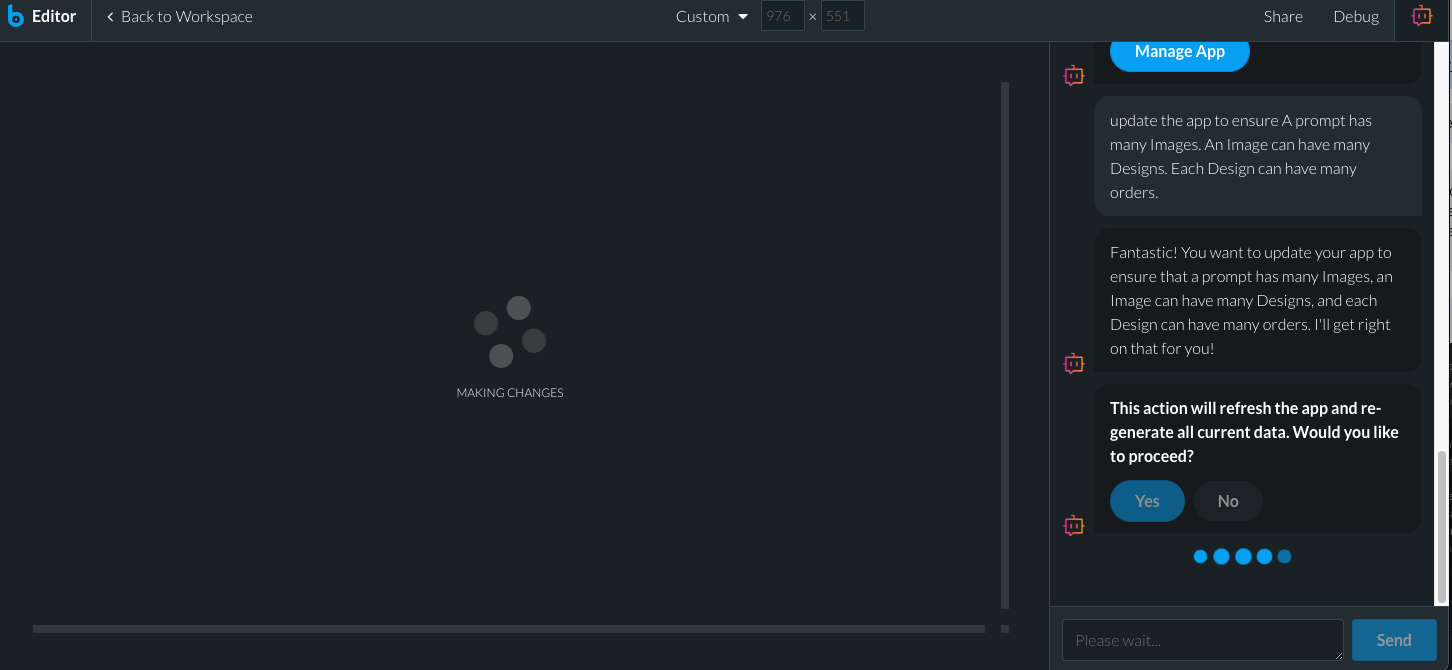
This will now update the app and ensure that the data relationships are correct. You can verify this by looking at the datatables in the Buzzy Workspace and checking the fields in the datatable to ensure that they either have “Subtables” for one to many relationships or “Linkedtable” fields for Many to Many relationships.
Obviously your prompt here is important and expect it may take a little trial and error. Each time an update app happens it will take a few minutes. While this may seem long, just think of the hours/days it saving the designs, developers, if they were using traditional design and development methods.
Once you have the core of the application defined and you’d like to customize the design further, you’ve probably reached the limits of what the AI can do at this point of time. So it’s time to jump into our UI/UX editor of choice, Figma. For those who don’t know, Figma the leading UX design tool used by UX/UI folk all over the world, it’s easy to use and easy to find folk skilled in it.
Option 2 - Make High Fidelity and Details changes in Figma
When you are ready to jump to Figma, treat it as a fork in the road and Figma becomes your new source of truth and you’re not going to go back to the AI to make changes any more.
Note the Buzzy Figma plugin will become important, not just for UX changes, but you will need to use it to make datamodel changes too. You will use it combined with the Buzzy Workspace going forward.
Ok, enough talk, let’s go and create your Figma file for your application
Step 3 - Importing into Figma
So “importing” the design into Figma is easy using the Buzzy Plugin, converting your AI-generated Buzzy app into an editable Figma file.
Open up the Buzz plugin (in Wizard mode - you can do this via settings) in on the Buzzy UI kits you have installed from the above page.
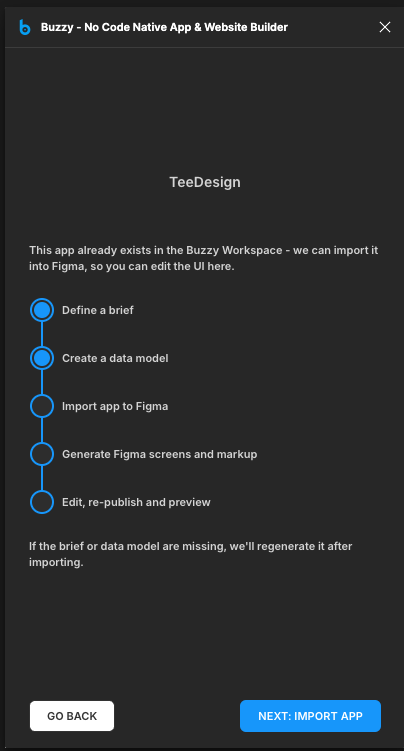
Select your application you created using Buzzy’s AI and “Import” it.
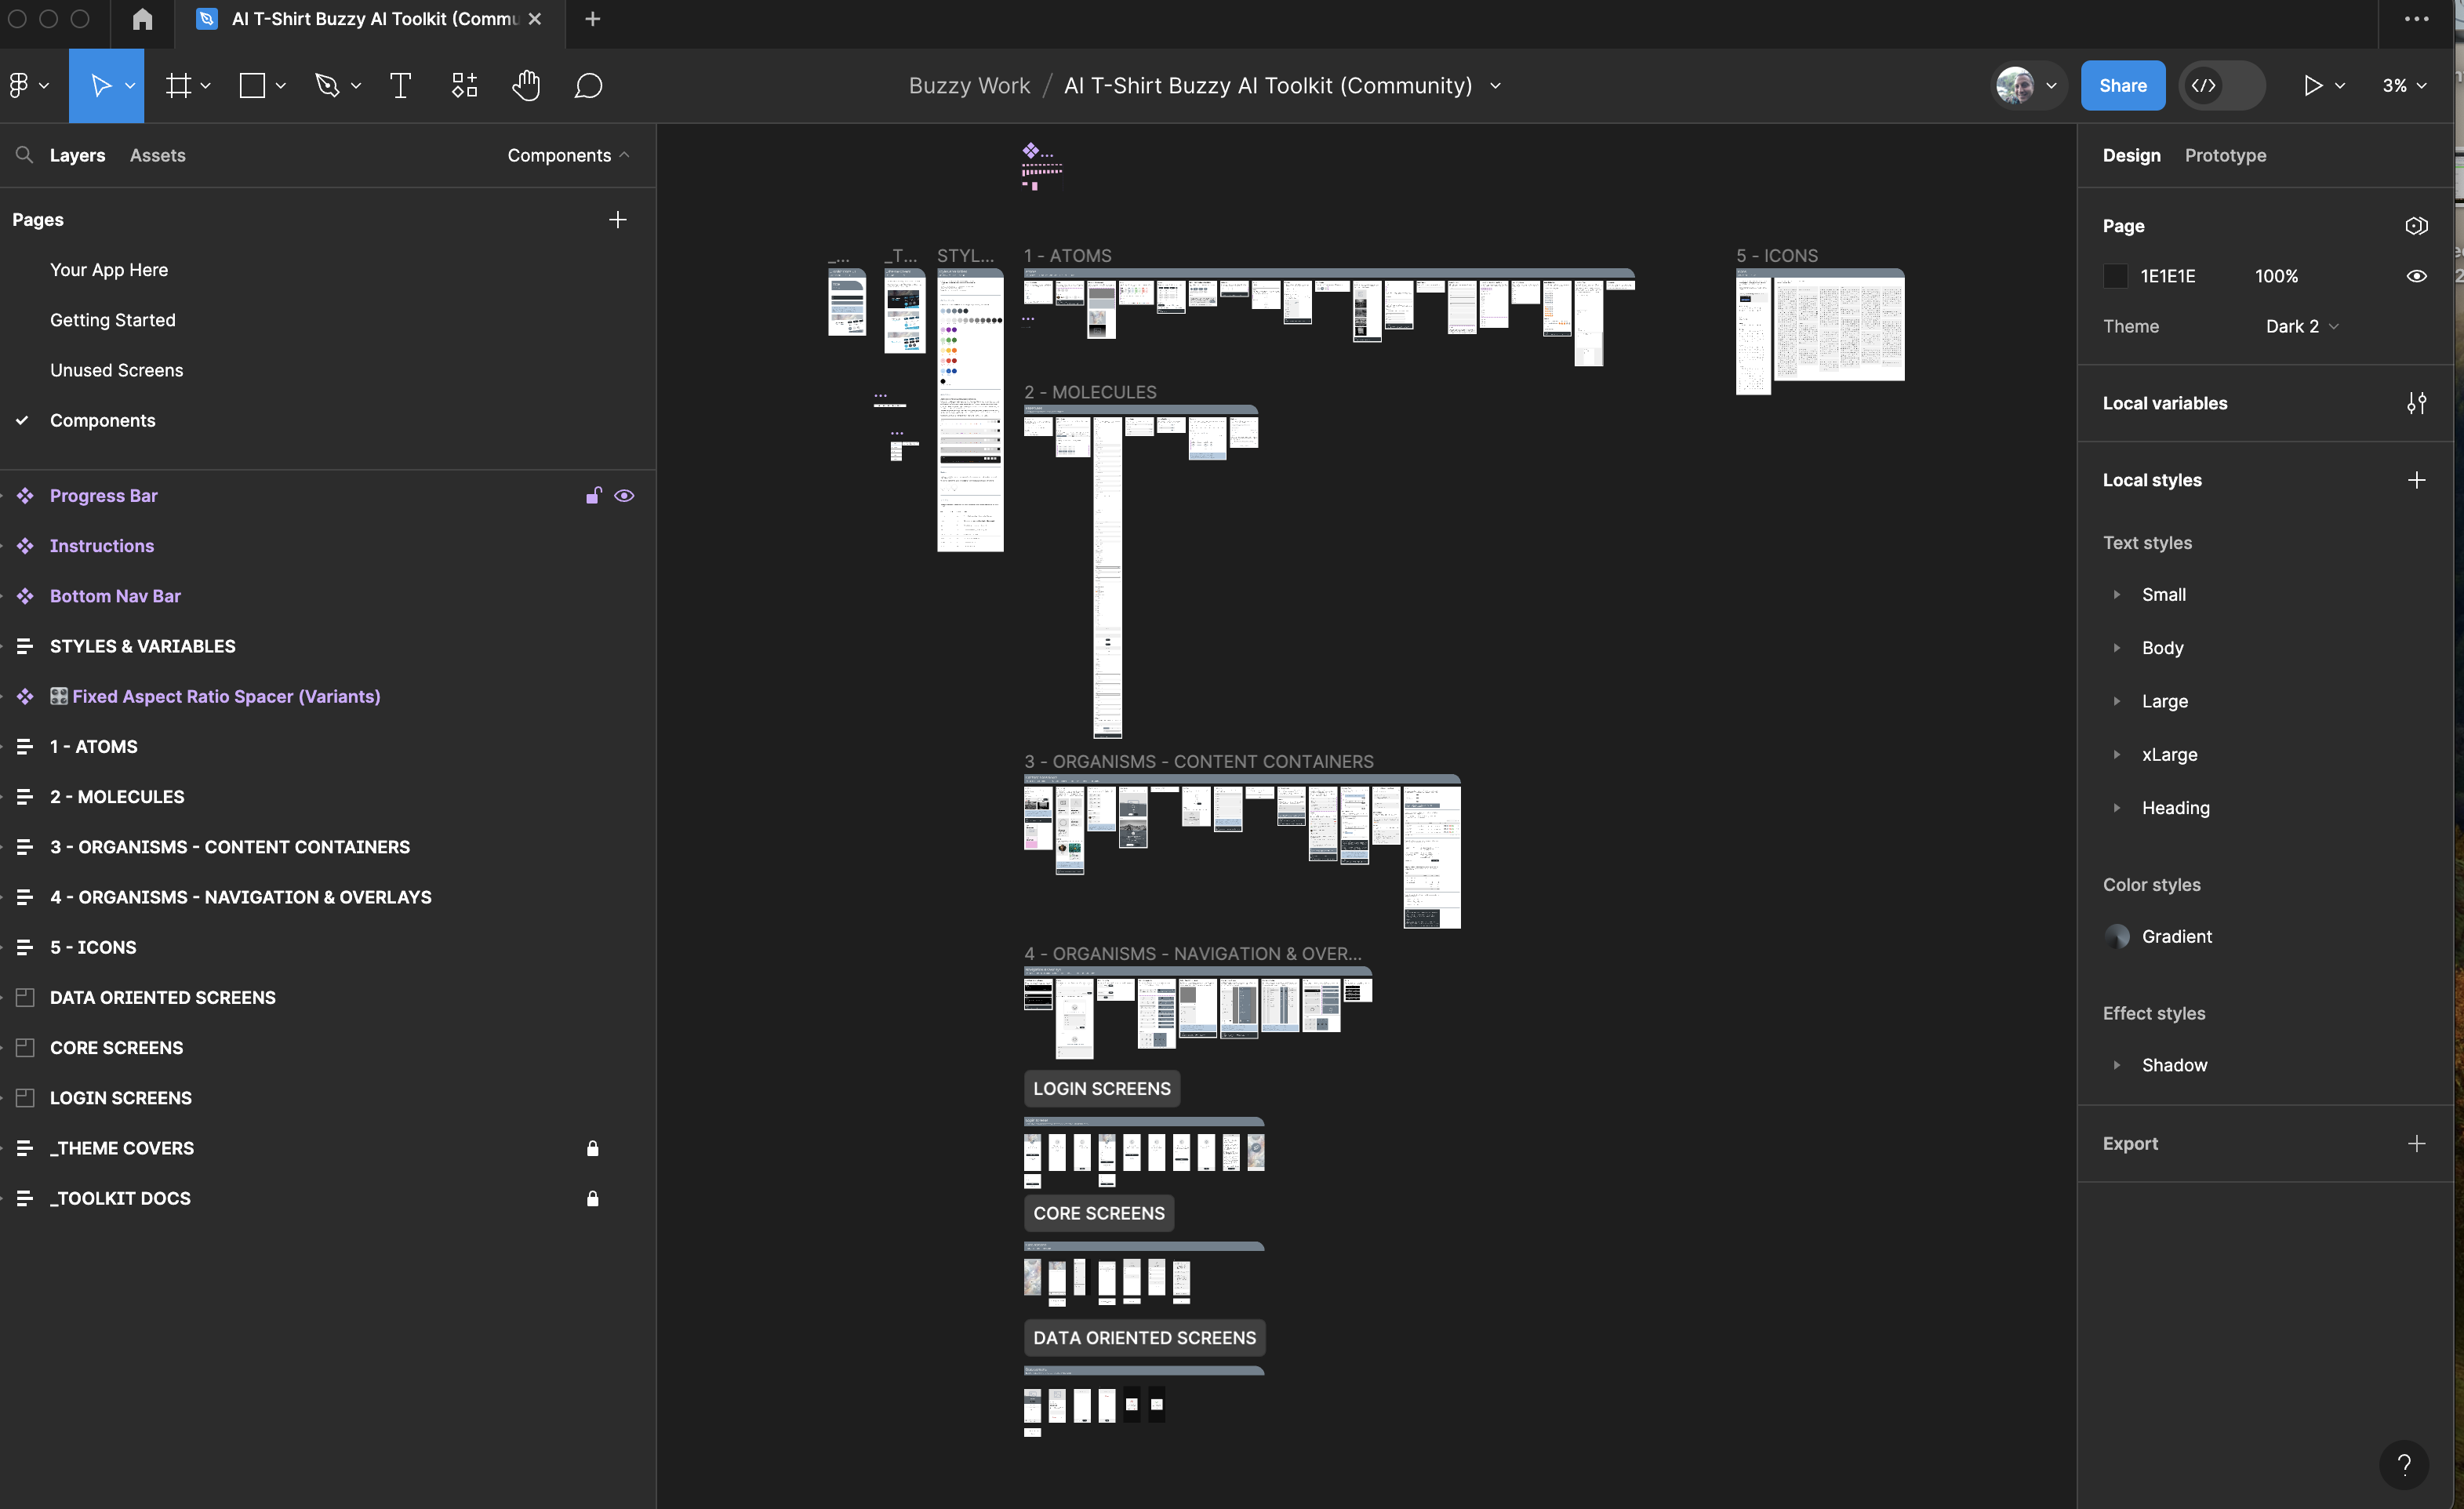
And a few minutes later you have the base Figma file:

In about 4 minutes, we generated 46 screens, 65 components, and 223 actions, all automatically wired up using AI and the Buzzy engine.
Think of the effort you have just saved your design team, giving them this starting point!
Just a reminder, you must decide: Is this close enough to get started? If yes, then you’re ‘forking’ and using Figma as your core source of truth, as opposed to making further changes with AI. For this example, we're thrilled with this starting point and will modify the look and feel in Figma.
Step 4 - tweaking in Figma
Our Figma designer will now take this starting point and adjust it to fit the desired UI and UX.
Given that the generated Figma file is based on a collection of reusable components, modifying the app's appearance and style becomes remarkably swift and efficient. Additionally, this file the uses Figma variables, enabling you to swiftly alter the app's overall theme with just a few clicks, ensuring a consistent design throughout.
For a quick guide on updating the UI in Figma see this documentation including some quick videos
And soon, Buzzyshirt's look and feel starts taking its final shape. Not a single line of code has been written to get this working in a browser or as a native app (iOS or Android) at this point.
Note: The AI generated the base application, but as of now, it cannot apply capabilities like security and login... but these can be configured in Figma and the Buzzy Workspace via point-and-click.
The Buzzy team plans to streamline these processes further, making it even faster and easier to add patterns like login, chat, checkout, etc.
After unleashing our designer on the generated Figma file it very quickly starts to resemble Buzzyshirt’s desired look and feel:
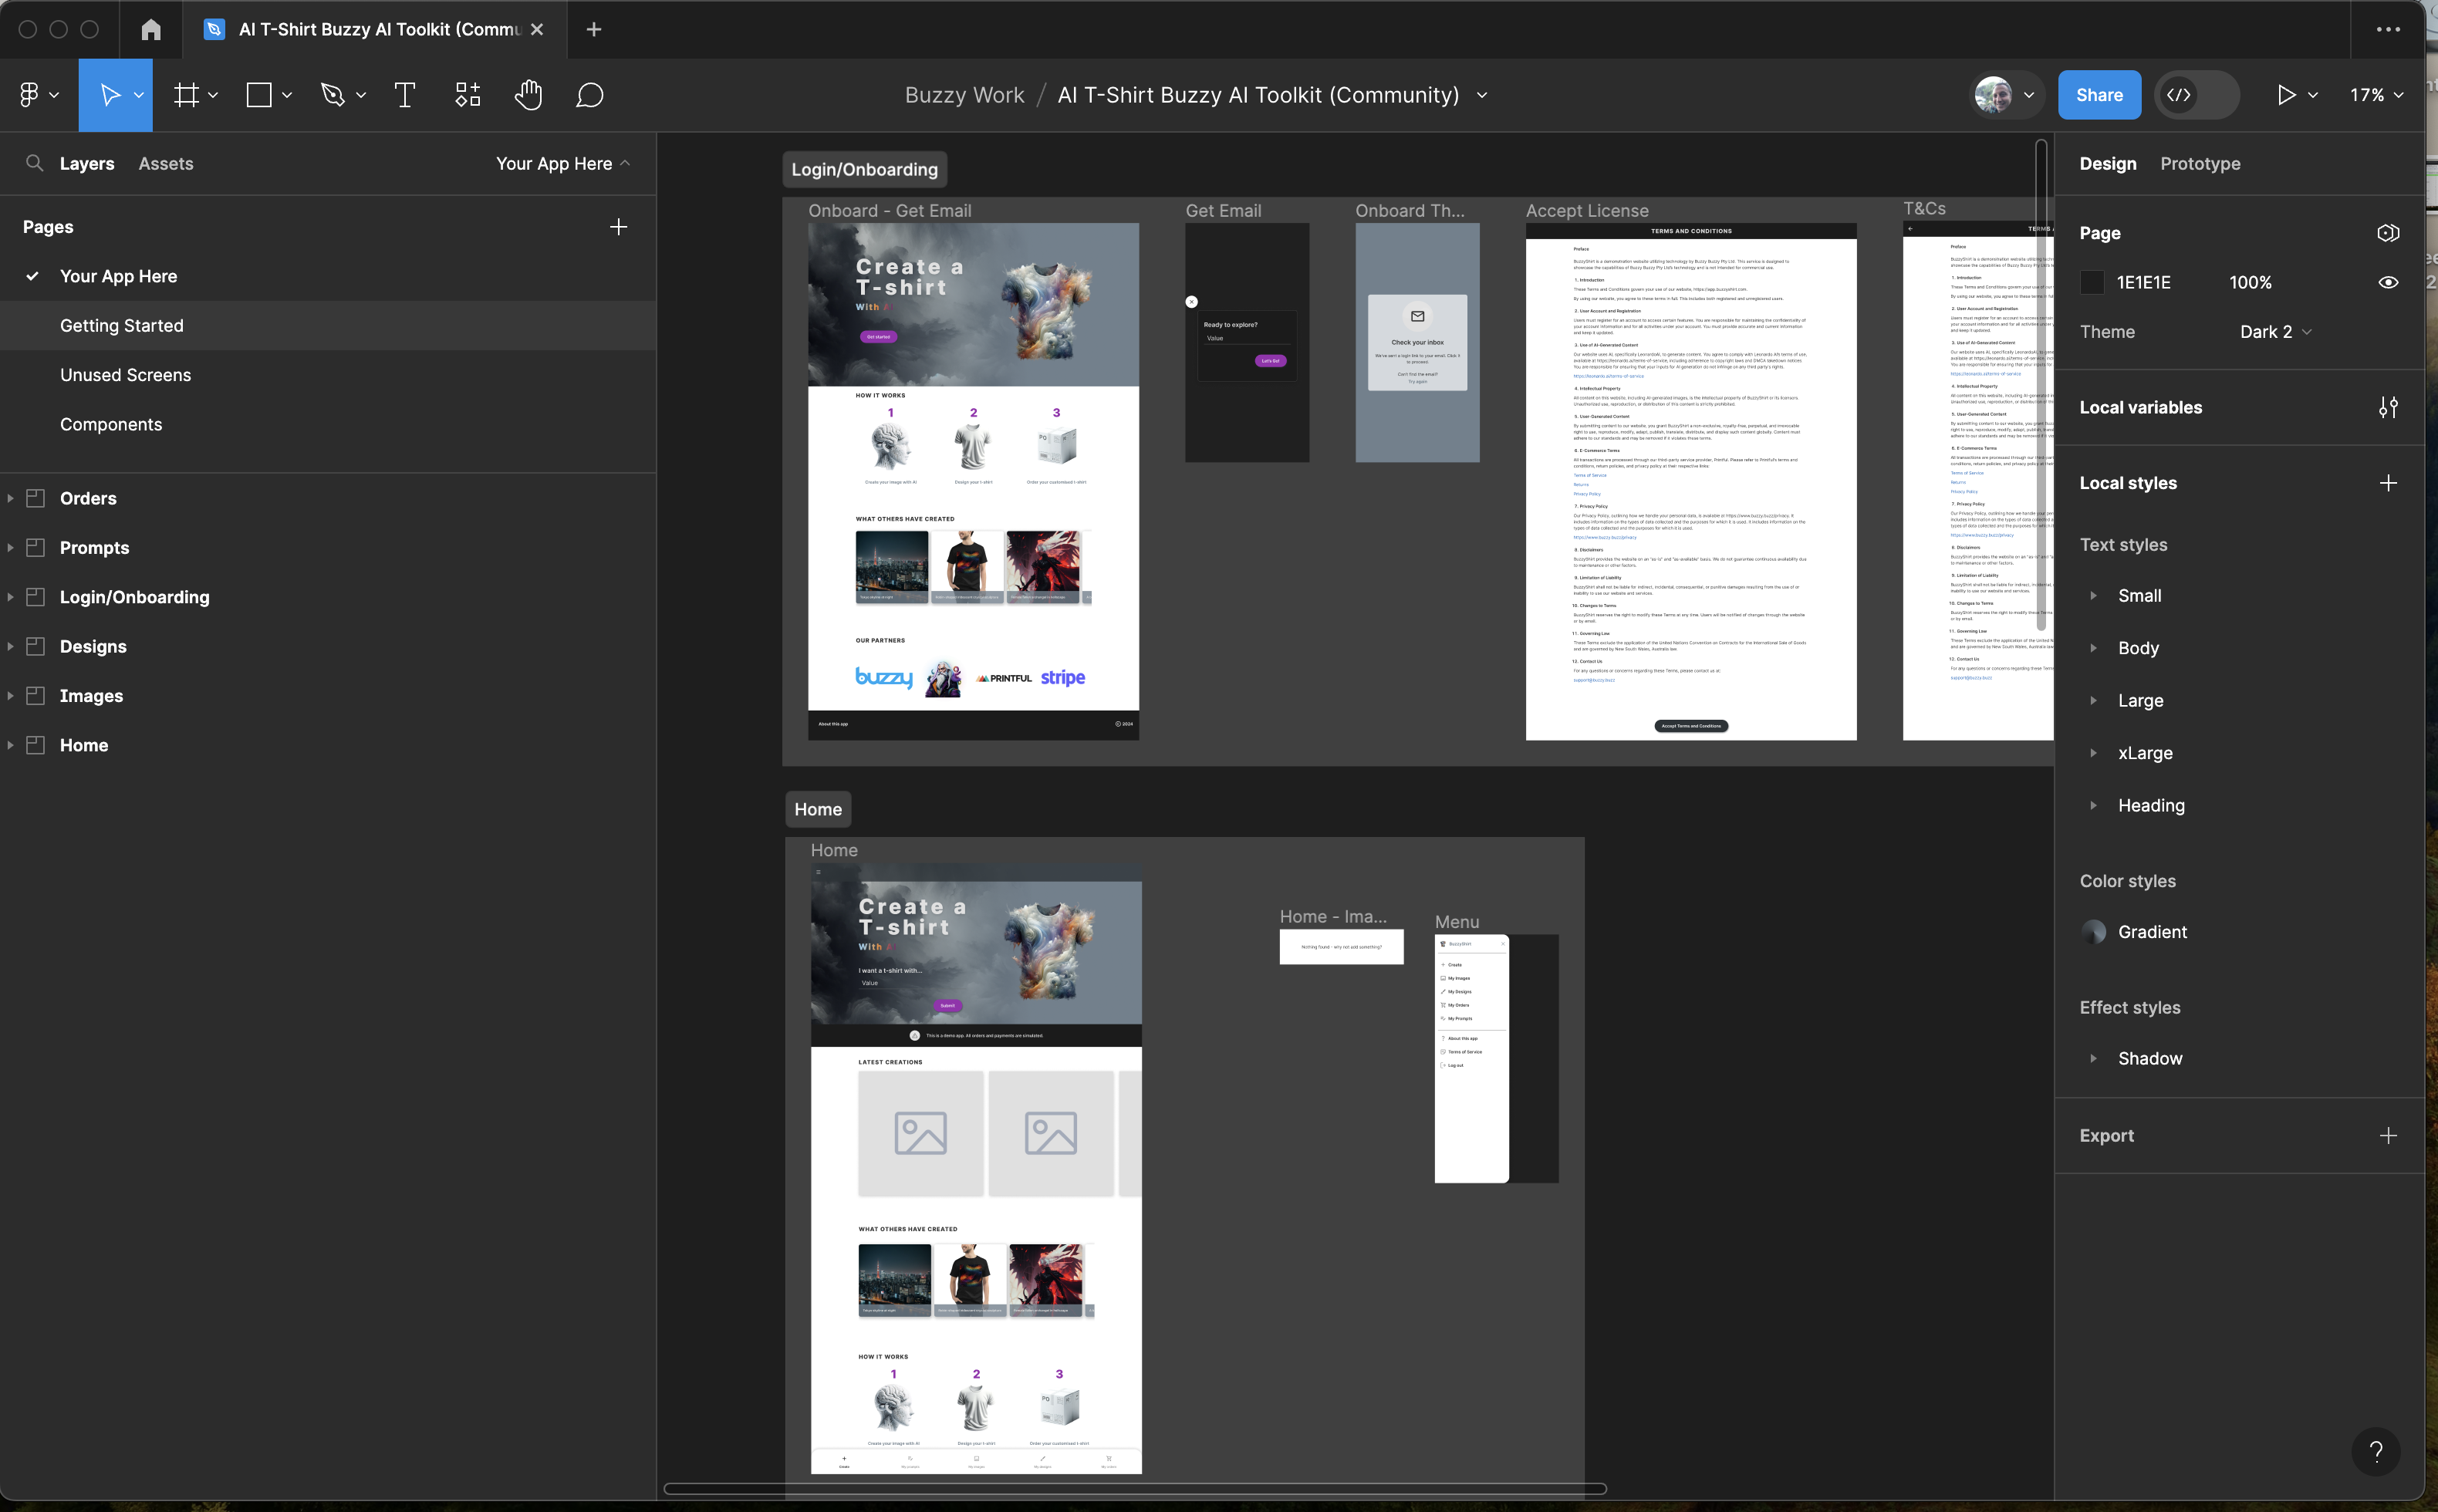
This app can be instantly “Published” via the Buzzy plugin, which will update the live web application (or native if you have that setup).
Wow! not one line of code written, at this point of time, to get this working real application, with it’s database, and it supports both browser and native (iOS or Android).
At this point of time Buzzy’s AI will generated the base application, it currently cannot apply features like security and login as of this writing. However, these features are configurable through Figma and the Buzzy Workspace using a point-and-click approach. It's important to mention that, the AI did generate the basic login screens, but integrating them fully requires manual configuration by a person, as demonstrated in this example.
The Buzzy team does plan to close as much of this as quickly as possible, making it even faster and easier to add in these patterns like login, chat, checkout etc
Grab a copy of the Figma file here
Step 5 - Now for the coding bits
Now that we have the base application working - a user can sign in, submit a prompt, and access screens for designs, orders, etc. - there are three key areas of coding needed:
Generating images using Leonardo.ai. This is done using a Buzzy Rule that triggers an AWS Lambda function, which in turn calls the AI image generation service.
Working with Printful. We chose Printful.com for their excellent service and well-documented API. They handle mockup rendering, printing, and delivery, while BuzzyShirt coordinates payments through Stripe.
Completing transactions with Stripe. When users are satisfied with their Printful quotes, they complete the transaction using a ‘Pay’ button configured via the Buzzy Figma plugin.
Generating the images using Leonardo.ai
This was implemented using a Buzzy Rule , that when a new prompt is created it will call a AWS Lambda function, which will intern call the AI image generation (leonardo.ai).
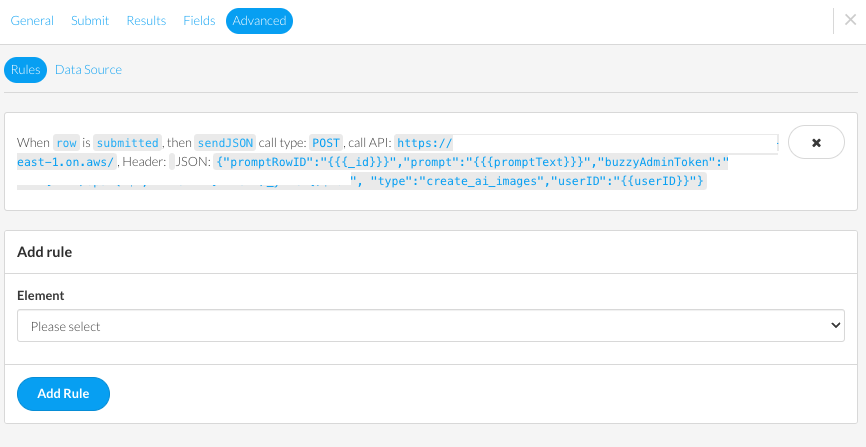
The external Function, which does not have to be an AWS Lambda Function, it could have been a Digital Ocean Function or just a REST API endpoint written of your language of choice (NodeJS, Python, PHP etc) that runs when the Buzzy Rule calls it.
The function has 2 man purposes:
It makes the initial call to the image generating AI
Process the call , when the AI is complete (via webhook)
The reason this is split into 2 asynchronous calls is that the external AI (Leonardo) could take a long time 30+ seconds to minutes to process the prompt and turn it into a set of images. This approach is their recommended best practice to deal with this type of long running task.
So the Function a) sends the initial call b) has a webhook to wait for the response
Here is the code to do that.
And this is what happens when a user prompts “A yellow sunflower in a field of red roses”
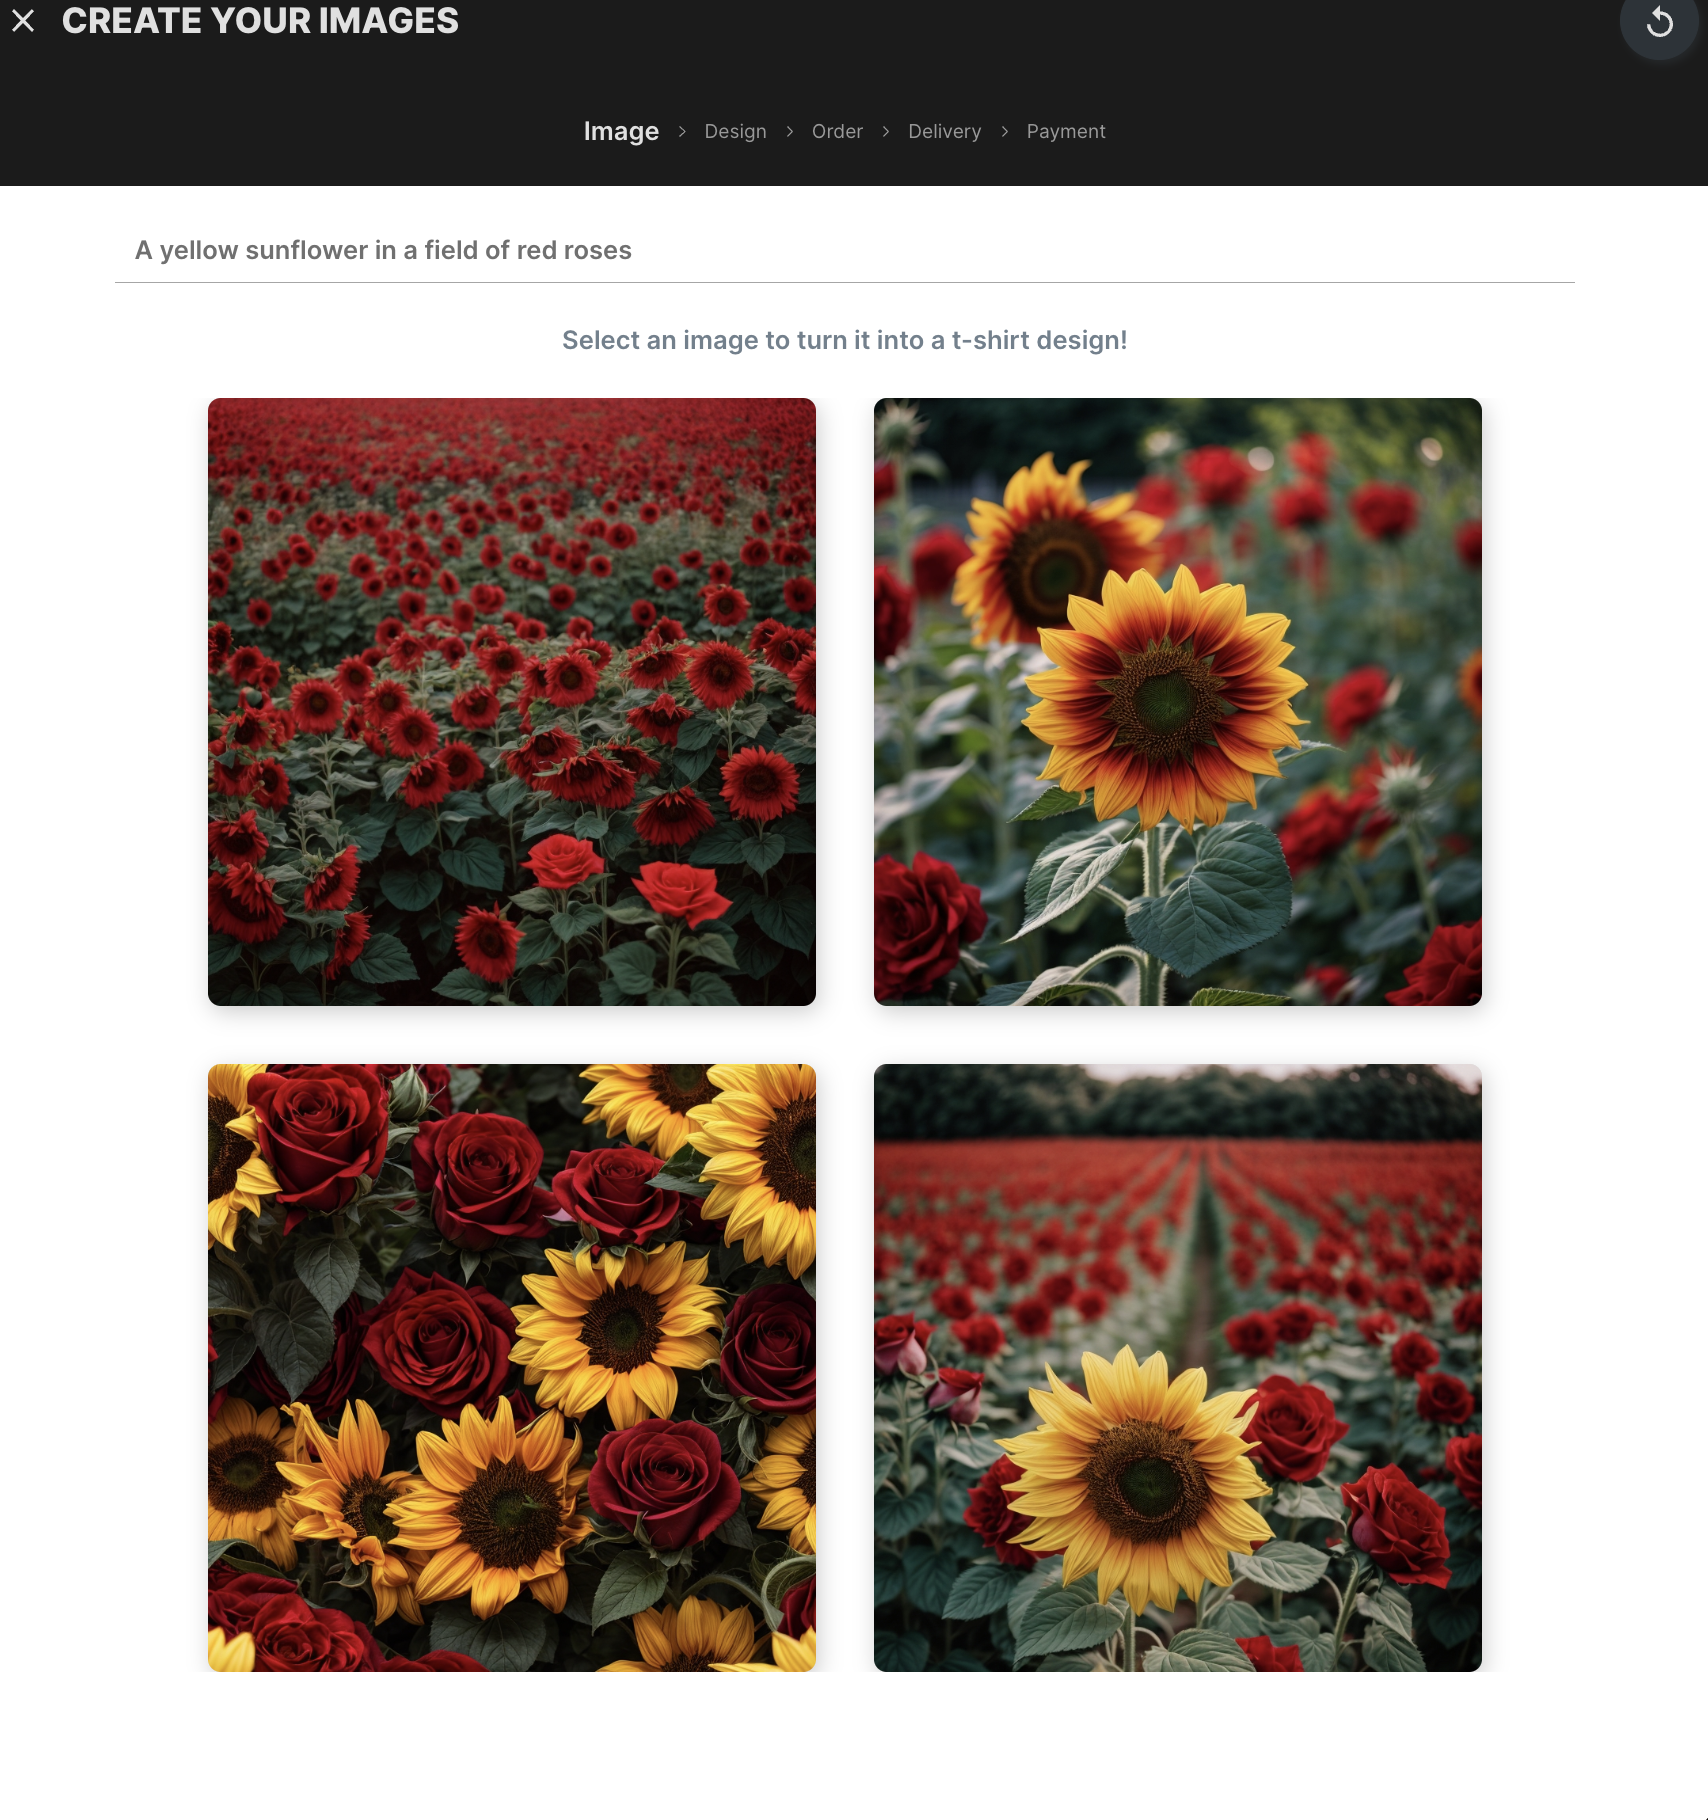
Buzzy passes the prompt to the external code (eg AWS Lambda Function). The custom code calls Leonard.ai to generate the images. Leonardo.ai calls a web webhook (in the AWS Lambda function). On receiving a successful response, the function then process the generated images and inserts them into the "Images" datatable , using the Buzzy REST API and stores the results as separate records within a Buzzy to render and use as part of the application as needed.
Now, when a user chooses one the desired image (eg Image 4) it's time to call Printful, another external printing service.
Working with Printful
For the purposes of this example, we wanted to use a 3rd party manufacturing/logistics solution. We chose Printful.com which had a great service and a well documented API.
While Printful deals with the rendering of mockups, printing and delivering, BuzzyShirt would be responsible for paying Printful. So this would need to be coordinated with Stripe to handle the payment.
Underlying all of this Buzzy would be handing the complete dataflow from Prompt to (AI) Images to Design to Order.
So the Printful Function would need to deal with 2 main functions:
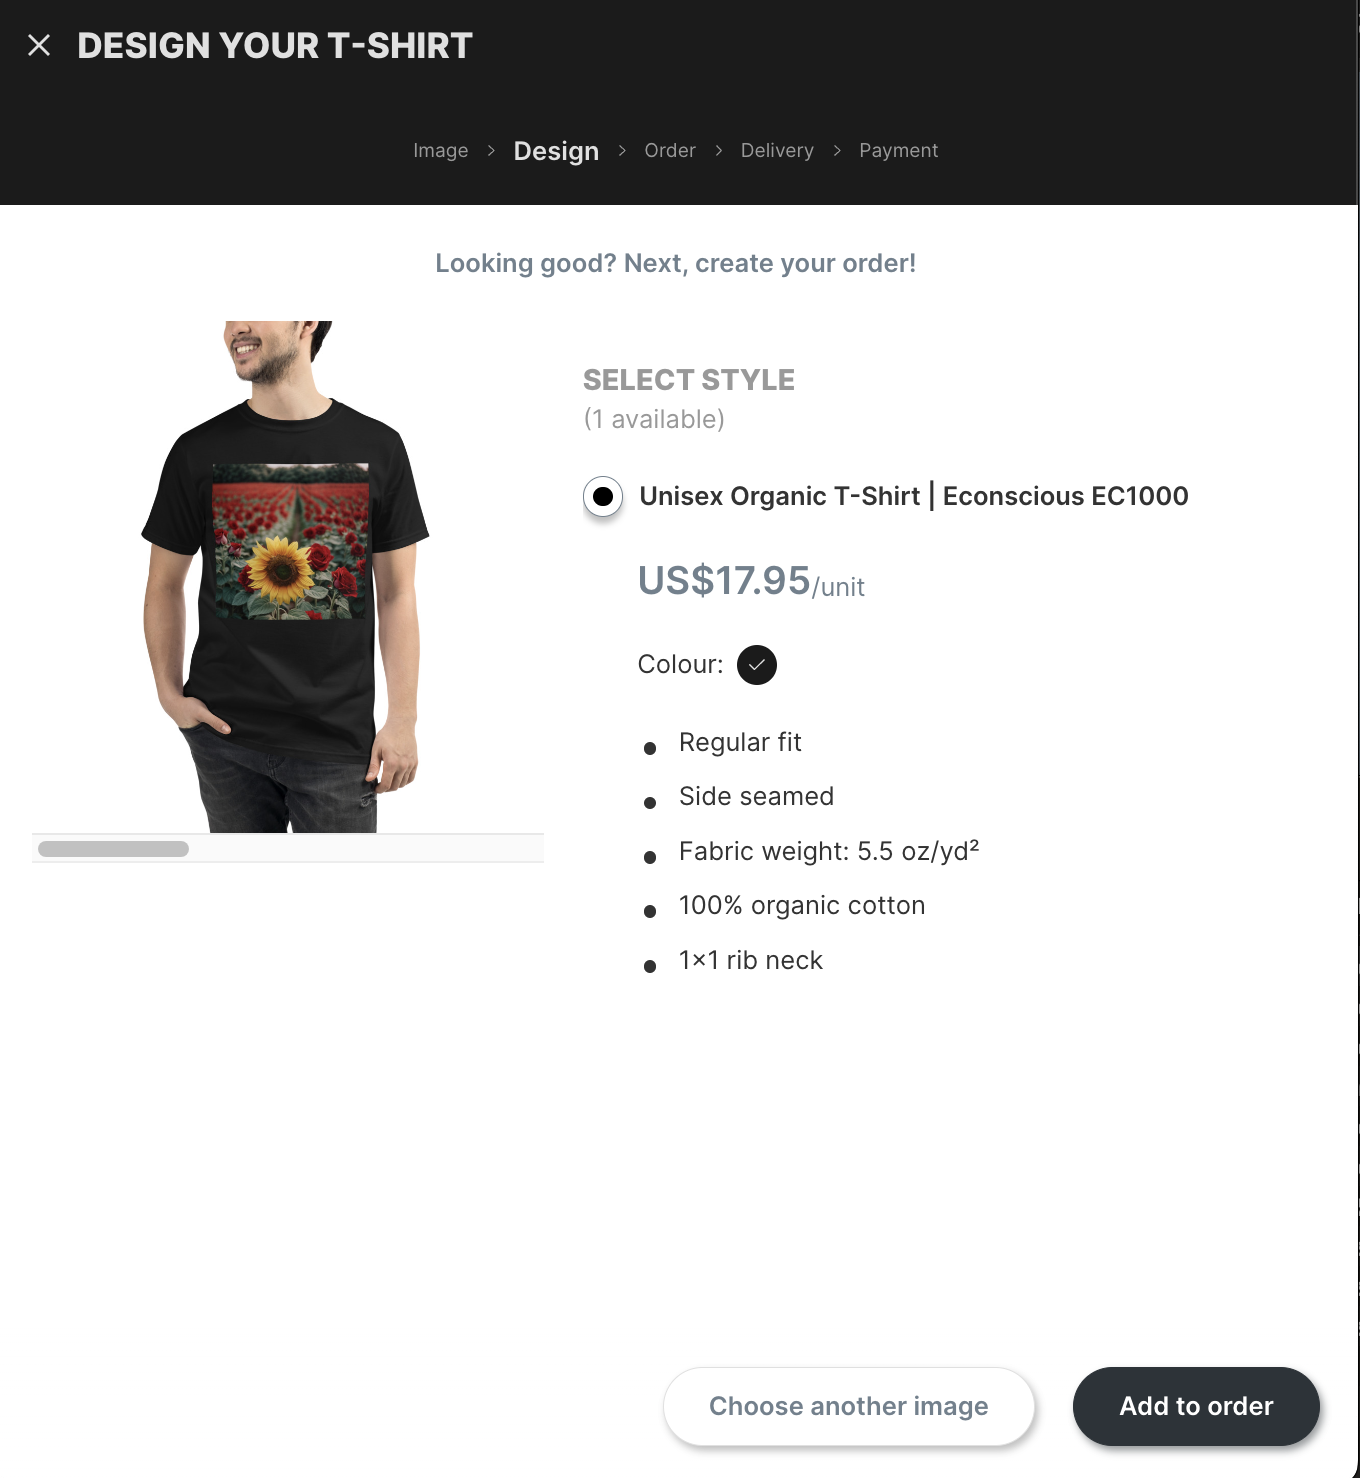
Generating the Mockup of the image on a black T-shirt (our chosen product), see below selecting the 4th example image above renders the mockup/design below
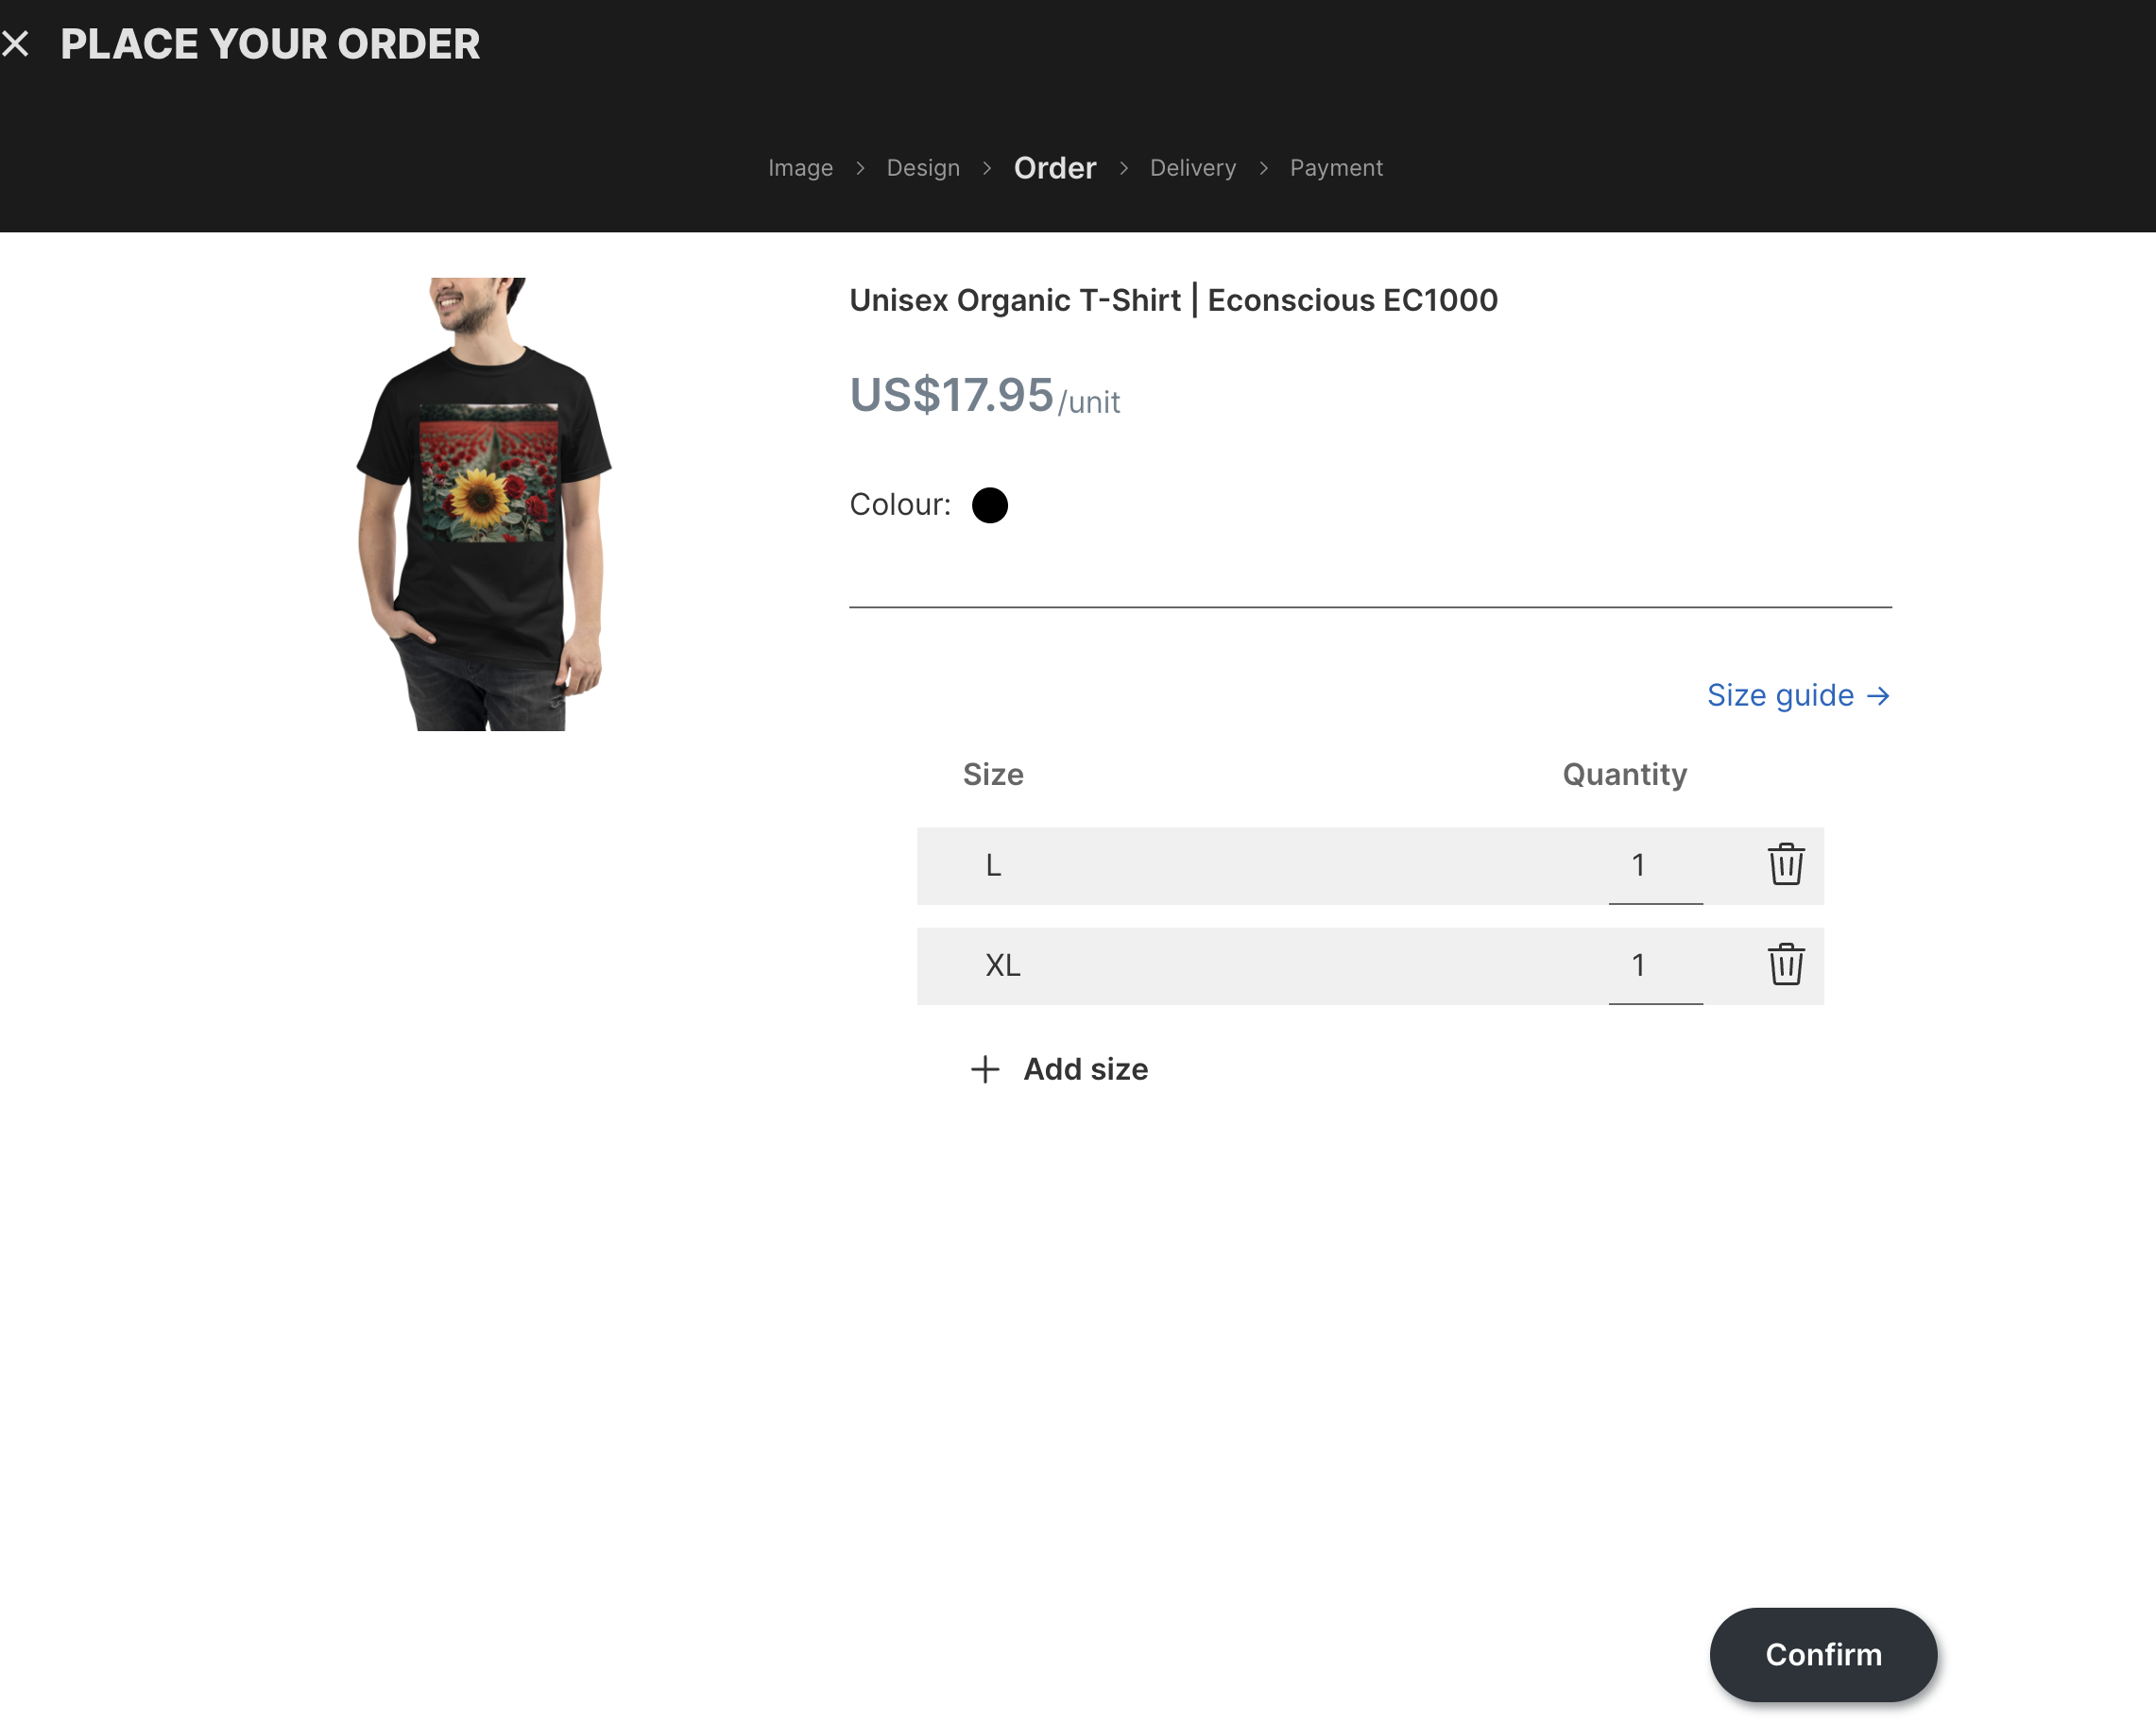
2. Quoting/Ordering - the complete order, including delivery costs. Note Printful also validates the shipping address’s city, zip/post code.
For example,
Code example for the Printful AWS Lambda Function is here.
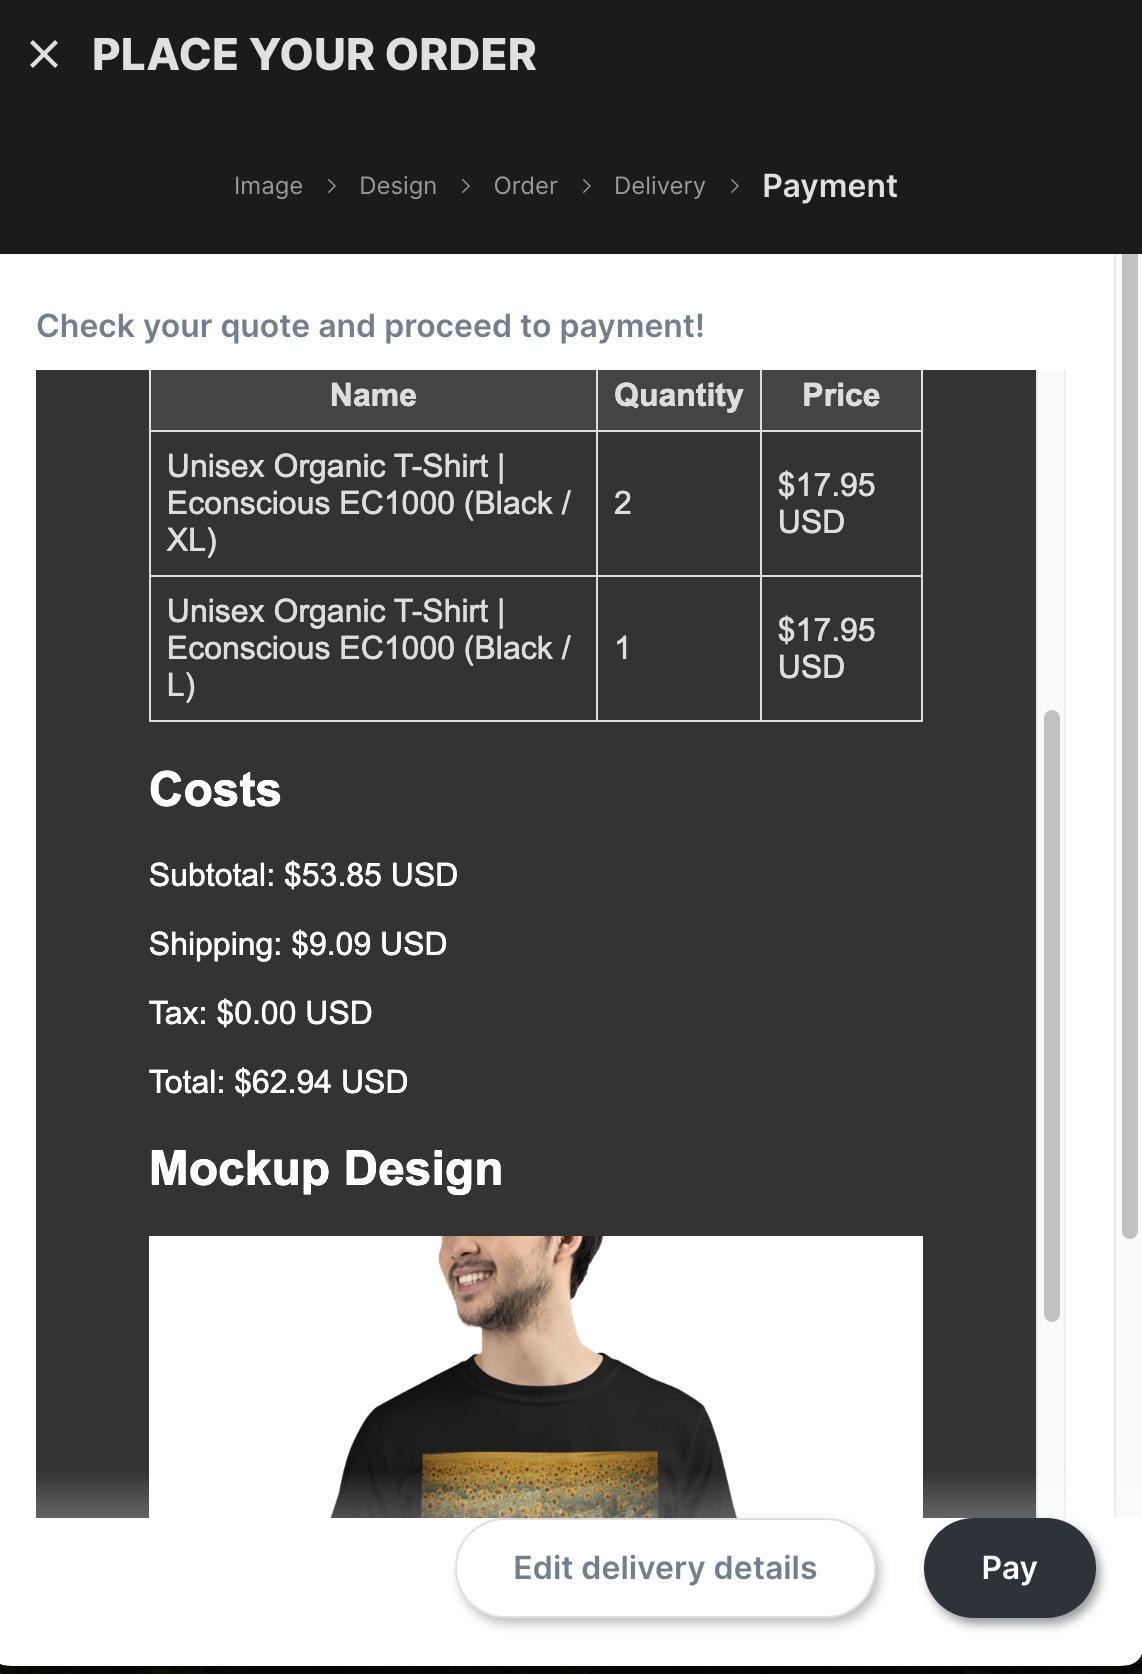
For the purposes of this example, the Order preview/Quote we just used a Buzzy Code Widget field in Buzzy. We used the AI to generate the HTML/JS based on a prompt where we gave the AI the resulting JSON object coming back from Printful (Order) and asked it to format it nicely.
Here is the HTML and JS for the CodeWidget
That said, you may want to use Figma to present this data and not a Code Widget, if so, this will require capturing the data in the Data Model and configuring FIgma to render it. Using the MVP head-set we decided that a CodeWidget using HTML was fine for this.
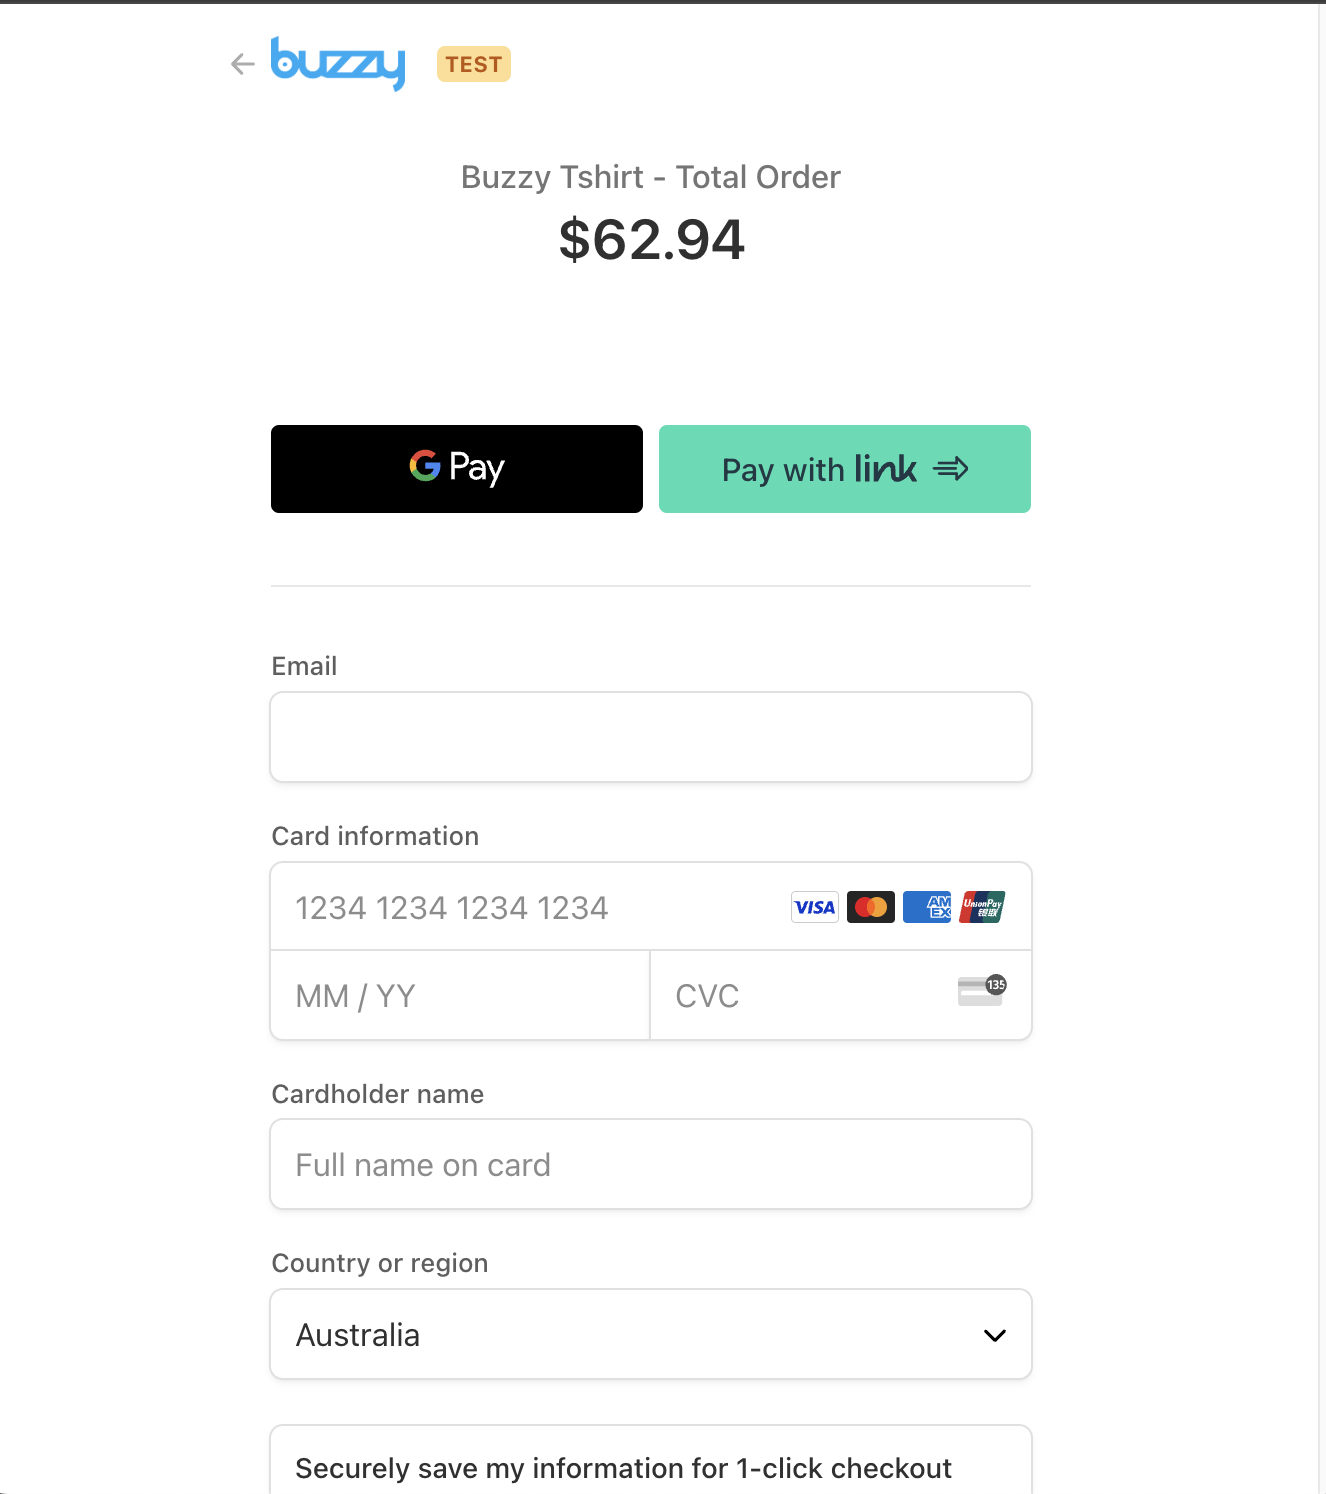
Completing the transaction with Stripe
So when a user is happy with their quote form Printful then they complete the transaction using the “Pay” button
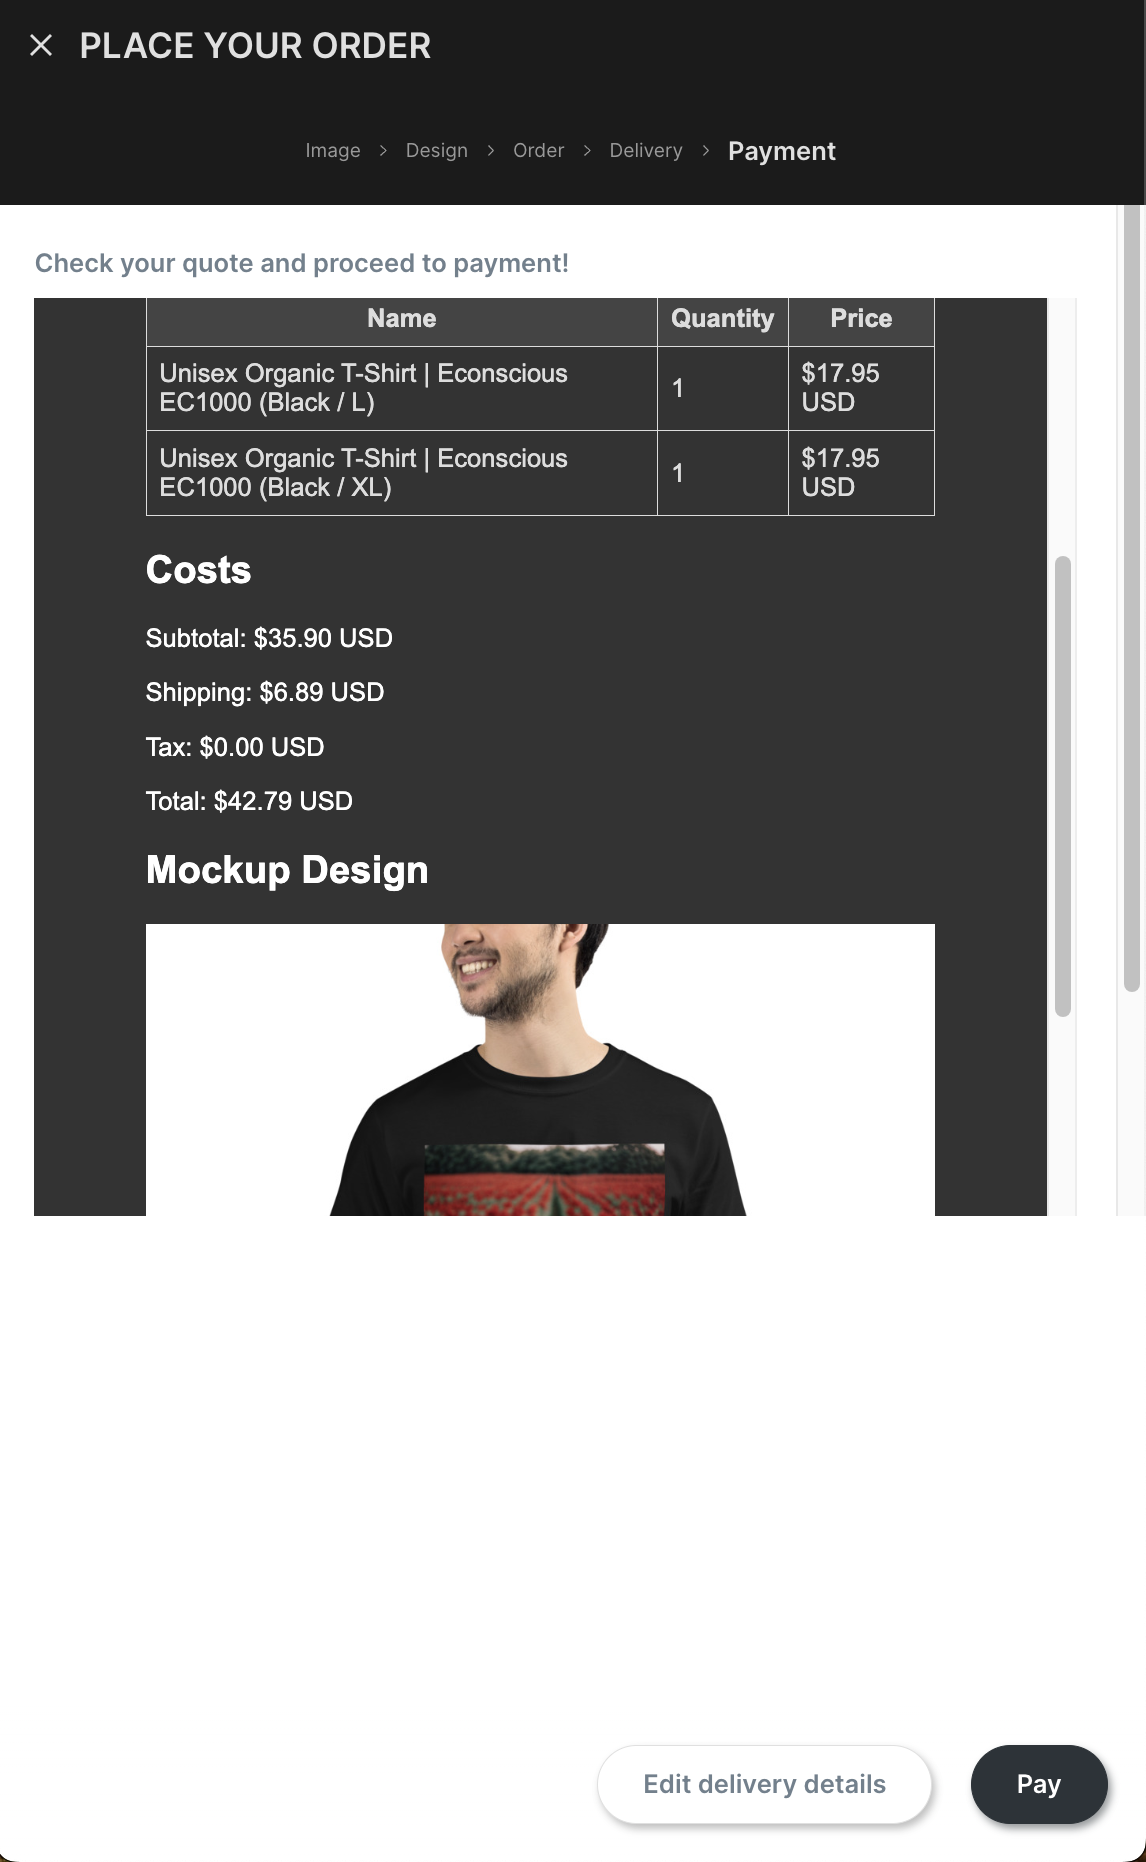
The Pay Button is configured using the Buzzy Figma plugin and takes a number of Stripe parameters, as well as where to go on a successful transaction.
For the purpose of this article we set it up as a “Test Stripe” transaction so that you can see the resulting flow with a test credit card number…. But, um, sorry that means you don’t get a t-shirt :-(
We could have passed each of the invoice lines, but for MVP we kept it simple.
Note you can configure this to implement Stripe yourself, but again for the purposes of a MVP we went the quick option. Stripe’s checkout customizer allows you to further customize your checkout page.
Code example for the Stripe AWS Lambda function is here
Step 6 - testing and tweaking
We got our first version up and running in a few days. After that, it was time for user testing.
No matter the skill level of your designers and developers, testing is crucial. We use Userbrain.com for our internal app development. Their service quickly provides real user feedback, uncovering functional oversights and suggesting simple UX and wording improvements.
With Buzzy’s ability to quickly update designs in Figma and instantly publish changes, iterating becomes swift and easy, even for substantial changes like adding screens or modifying the data model.
Step 7 - where to next?
Buzzy has the ability to connect with Google Analytics or other analytics tools to give you better insight on your road to Product Market Fit
SEO and custom headers - optimize you application for SEO, if that’s a requirement.
VNext - keeping the feedback loop tight keep iterating. Remember the MVP was was to real customer feedback and revenue as quickly as possible. … so now you can keep tweaking. Beware of the bloat - keep it lean!
Conclusion
In conclusion, our experience with Buzzy underscores the transformative impact of no-code platforms in the realm of tech entrepreneurship. Buzzy exemplifies how innovation can be democratized, allowing ideas to be swiftly turned into functional MVPs regardless of technical expertise.
The integration of AI, alongside tools like Figma, Leonardo.ai, and Printful, accelerates the development process, enabling rapid prototyping, testing, and deployment.
As we move forward, platforms like Buzzy are not just tools, but catalysts for creativity and efficiency, making the journey from concept to market-ready product faster and more accessible than ever. For anyone looking to turn their vision into reality, Buzzy offers a compelling pathway to success in the dynamic world of digital innovation.
Key info/links
The working Figma file for BuzzyShirt
About the Author
Adam Ginsburg is Founder & CEO of Buzzy. Buzzy is an AI powered no code platform that allows you to turn an idea into an app, instantly. Try it here. In addition to working at Buzzy, Adam is a husband, father and surfer. Adam was a co-founder of Aptrix, which IBM acquired and became IBM Web Content Manager.
About Buzzy
Buzzy is an AI powered nocode platform that allows your to start with a prompt and generate a full stack application in minutes. You can extend the solutions using custom client or server-side code, that can be written by hand or an AI co-pilot. In addition to generating the application Buzzy allows you to generate a Figma file, that you can customize the high-fidelity design and re-publish the changes instantly, without having to write any code. Rego for Free Buzzy webinars here